|
Metalworking – The Art of Shaping Metal
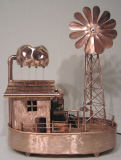
Metalworking is the craft/skill/ability to shape metal into useful objects or items of art. It is a hugely rewarding hobby that creates items that can last many lifetimes. The items you create can be everyday useful or purely works of art. It is entirely up to you!
Civilization has evolved from ancient times largely due to women and men learning to work with metals. Had you lived some 12,000 years ago you very likely might have picked up a piece of native metallic copper off the ground and made some sort of tool or spear head with it. Later as humans learned to melt metals such as copper and zinc, you would have discovered bronze which due to its greater strength made even better tools. Later still, we learned to work with iron and the tools and machines of modern society became possible.
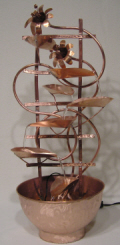
Gold and copper were some of the earliest metals used by humans due to the fact that they are soft and easy to work with, and they are both found naturally in metallic form. This is why today, at least affordable copper is still a popular craft metal. It is my personal metalworking favorite!
Today it is easy for you to purchase sheets of copper, brass, aluminum, and steel in any size and thickness. There are many metalworking suppliers that will sell with no minimum quantity.
Copper is my recommendation for you first projects. It is easy to work into shapes, it can be annealed by heating with a torch or hardened by hammering or bending. Copper is easily soldered and it does not rust.
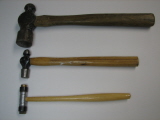
Some of the tools you will want to have include: A Ball Peen Hammer Riveting Hammer Rawhide Mallet Tin Snips Heavy Duty Scissors Straight Edge Tape Measure Scratch Awl Steel Square Vise Propane Torch Solder and Flux Hack Saw Jewelers Saw Dremel Like Multi-Tool (Optional but very handy!) Anvil (Heavy steel flat surface) Window Screen Spline Tool (Works great for creasing copper sheet!)
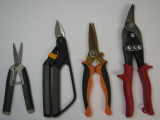
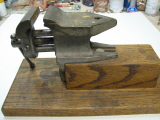

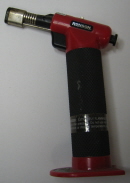
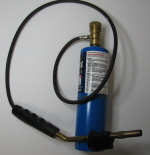
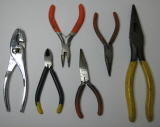
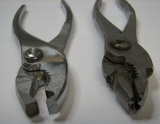
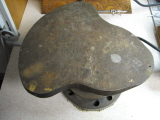
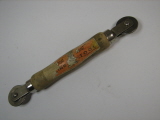
You will find others as you develop your craft skills and many of them you will make yourself. I have a number of crimping and bending tools that I made from some cheap pliers and my Dremel Grinder.
I use various sizes of copper tubing and pipe in some of my creations so a tubing cutter comes in real handy for cutting precise lengths.
Some basic metalworking techniques you will need to learn and practice include using the tin snips, bending, shaping, annealing, soldering, scribing and using patterns. Each of these skills are pretty simple but there are a few tricks that may save you time and in some cases pain.
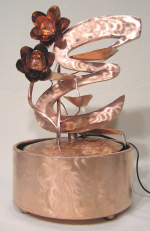
Using tin snips – first I would recommend having several sizes of snips and scissors. I have four on my workbench just because I use several thicknesses of copper in my creations. As a rule I use the smallest cutting tool that will do the job, just because I seem to waste less metal following this philosophy. Here are some guidelines:
Copper 36 gauge, 5 mil thickness is very easy to cut with even a small scissor.
Copper 30 gauge, 10 mil thickness is twice as thick as the 5 mil but can still be cut with a small scissor but I do use a slightly heavier scissor on occasion.
Copper 23 gauge, commonly call 16 ounce copper as it weighs a pound per square foot. This is the typical weight used by roofers. For this weight I use a small snips which actually looks like a heavy duty scissor. Anything heavier than this requires the heavy duty tin snips.
When cutting metals it is important to wear gloves to protect yourself from cuts and stabs. It is easy, even after you have practiced a bunch to create little slivers of metal along the cut edge. My experience is that these very sharp pointy critters have a life of their own and they are out to get you. Watch for these and be very careful. I bought some Kevlar gloves to protect my hands and they do keep your hands from being cut, but the little pointy slivers slide right through the fiber weave and still get you. Best bet is some light weight leather gloves, cheap and effective!
Bending metal, particularly copper is easy enough but practice will give you better results. Due to copper's softness it likes to wrinkle as you bend it. Make your bends a little at a time along the entire length of the bend line. If you bend a portion too much it tends to stretch some of the metal which when you finish the bend has to go somewhere. Usually it will end wrinkly or you end with an edge that doesn't want to lay flat.
These same bending issues are what you can make use of when shaping copper, or any metal for that matter. Shaping metal is all about stretching the metal in a controlled manner creating a desired effect. Usually this effect is gained by hammering the metal. I use a ball peen hammer most of the time. Sometimes on my hard anvil surface and sometimes on a “softer” wood block. Each creates a different visual and physical look.
Whenever you bend or hammer on copper you work harden it. I am always amazed when I use soft copper tubing in my creations. The first bend is really easy but, as soon as I stop that first bend it will be ten times harder to bend that same section the second time. To solve this problem I have to take the time to anneal the copper. This involves heating it with my propane torch to a dull red color and then cooling it off. You can dip it in water to cool it off, it is not like steel where rapid cooling makes it hard again. The downside of heating is that it will oxidize the finish which has to be buffed up. Sometimes I just muscle through it so I don't have to reclean the copper.
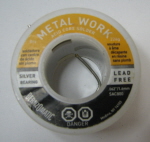
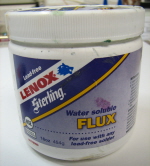
Soldering is most likely my favorite part of metalworking. Here again, a little practice will make you an expert pretty quick. I like to use a water based flux and a simple plumbing solder, both of which I get down the street at the home improvement store. Soldering is simple, just put a tiny amount of flux on the surfaces to be joined, use the propane torch to heat and touch the area with the solder. When it is hot enough the solder will flow between the two surfaces and stick them together. Solder melts and sticks at about 450 degrees F, so you don't have to get it really hot. Also, I use small mini-spring clamps to hold items to be solder in place. These cost about 59 cents and eventually burn up but are very helpful.
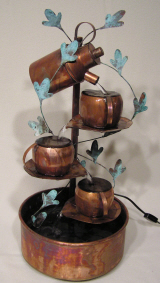
For some of my fountains and other metalworking projects I make on a regular basis, I create pattern pieces. I have patterns made from both heavy cardboard and copper sheet. The copper patterns are, of course, more durable and tend to be my preferred. As you unroll your copper sheet try to get it to lay flat on your work surface. Lay your pattern on the sheet and use either a soft pencil or a scratch awl to mark it. The downside of the pencil is that it will easily rub off if touched or rubbed against your skin or apron. Usually I am cutting a number of shapes at the same time. Once they are all closely fit together on the sheet I cut that whole section of sheet off. This allows you a lot more flexibility in cutting around each marked pattern. Basically, you need to accept that the metal between each piece will be waste. I keep all scraps and once in a while I can use one for some odd piece I need.
(Check out my writeup on electroforming for using the scrap pieces!)
Other descriptors include metal craft, coppersmith, craft ideas and hobby ideas.
(I use this stuff for my stained glass work as well!)
Physical Properties of Copper:Hardness 2½ - 3 Specific Gravity 8.9 Luster is softly reflective metallic brown red. Streak is reddish copper color. Hardness is 2.5-3 Specific Gravity is 8.9+ Melting point: 1,083 degrees C Boiling point: 2,567 degrees C Tensile strength: approx. 19,000 psi Atomic number: 29 Atomic weight: 63.546
Some Other Metalworking Resources To Help You Get Started:Metalworking Clubs And Associations:
Return From Metalworking to Crafts Part 2
|
